Connect TalkerIQ with HubSpot CRM to automate lead tracking, call logging, and SMS sync. Follow these simple steps to get started in minutes.

Official HubSpot Partner
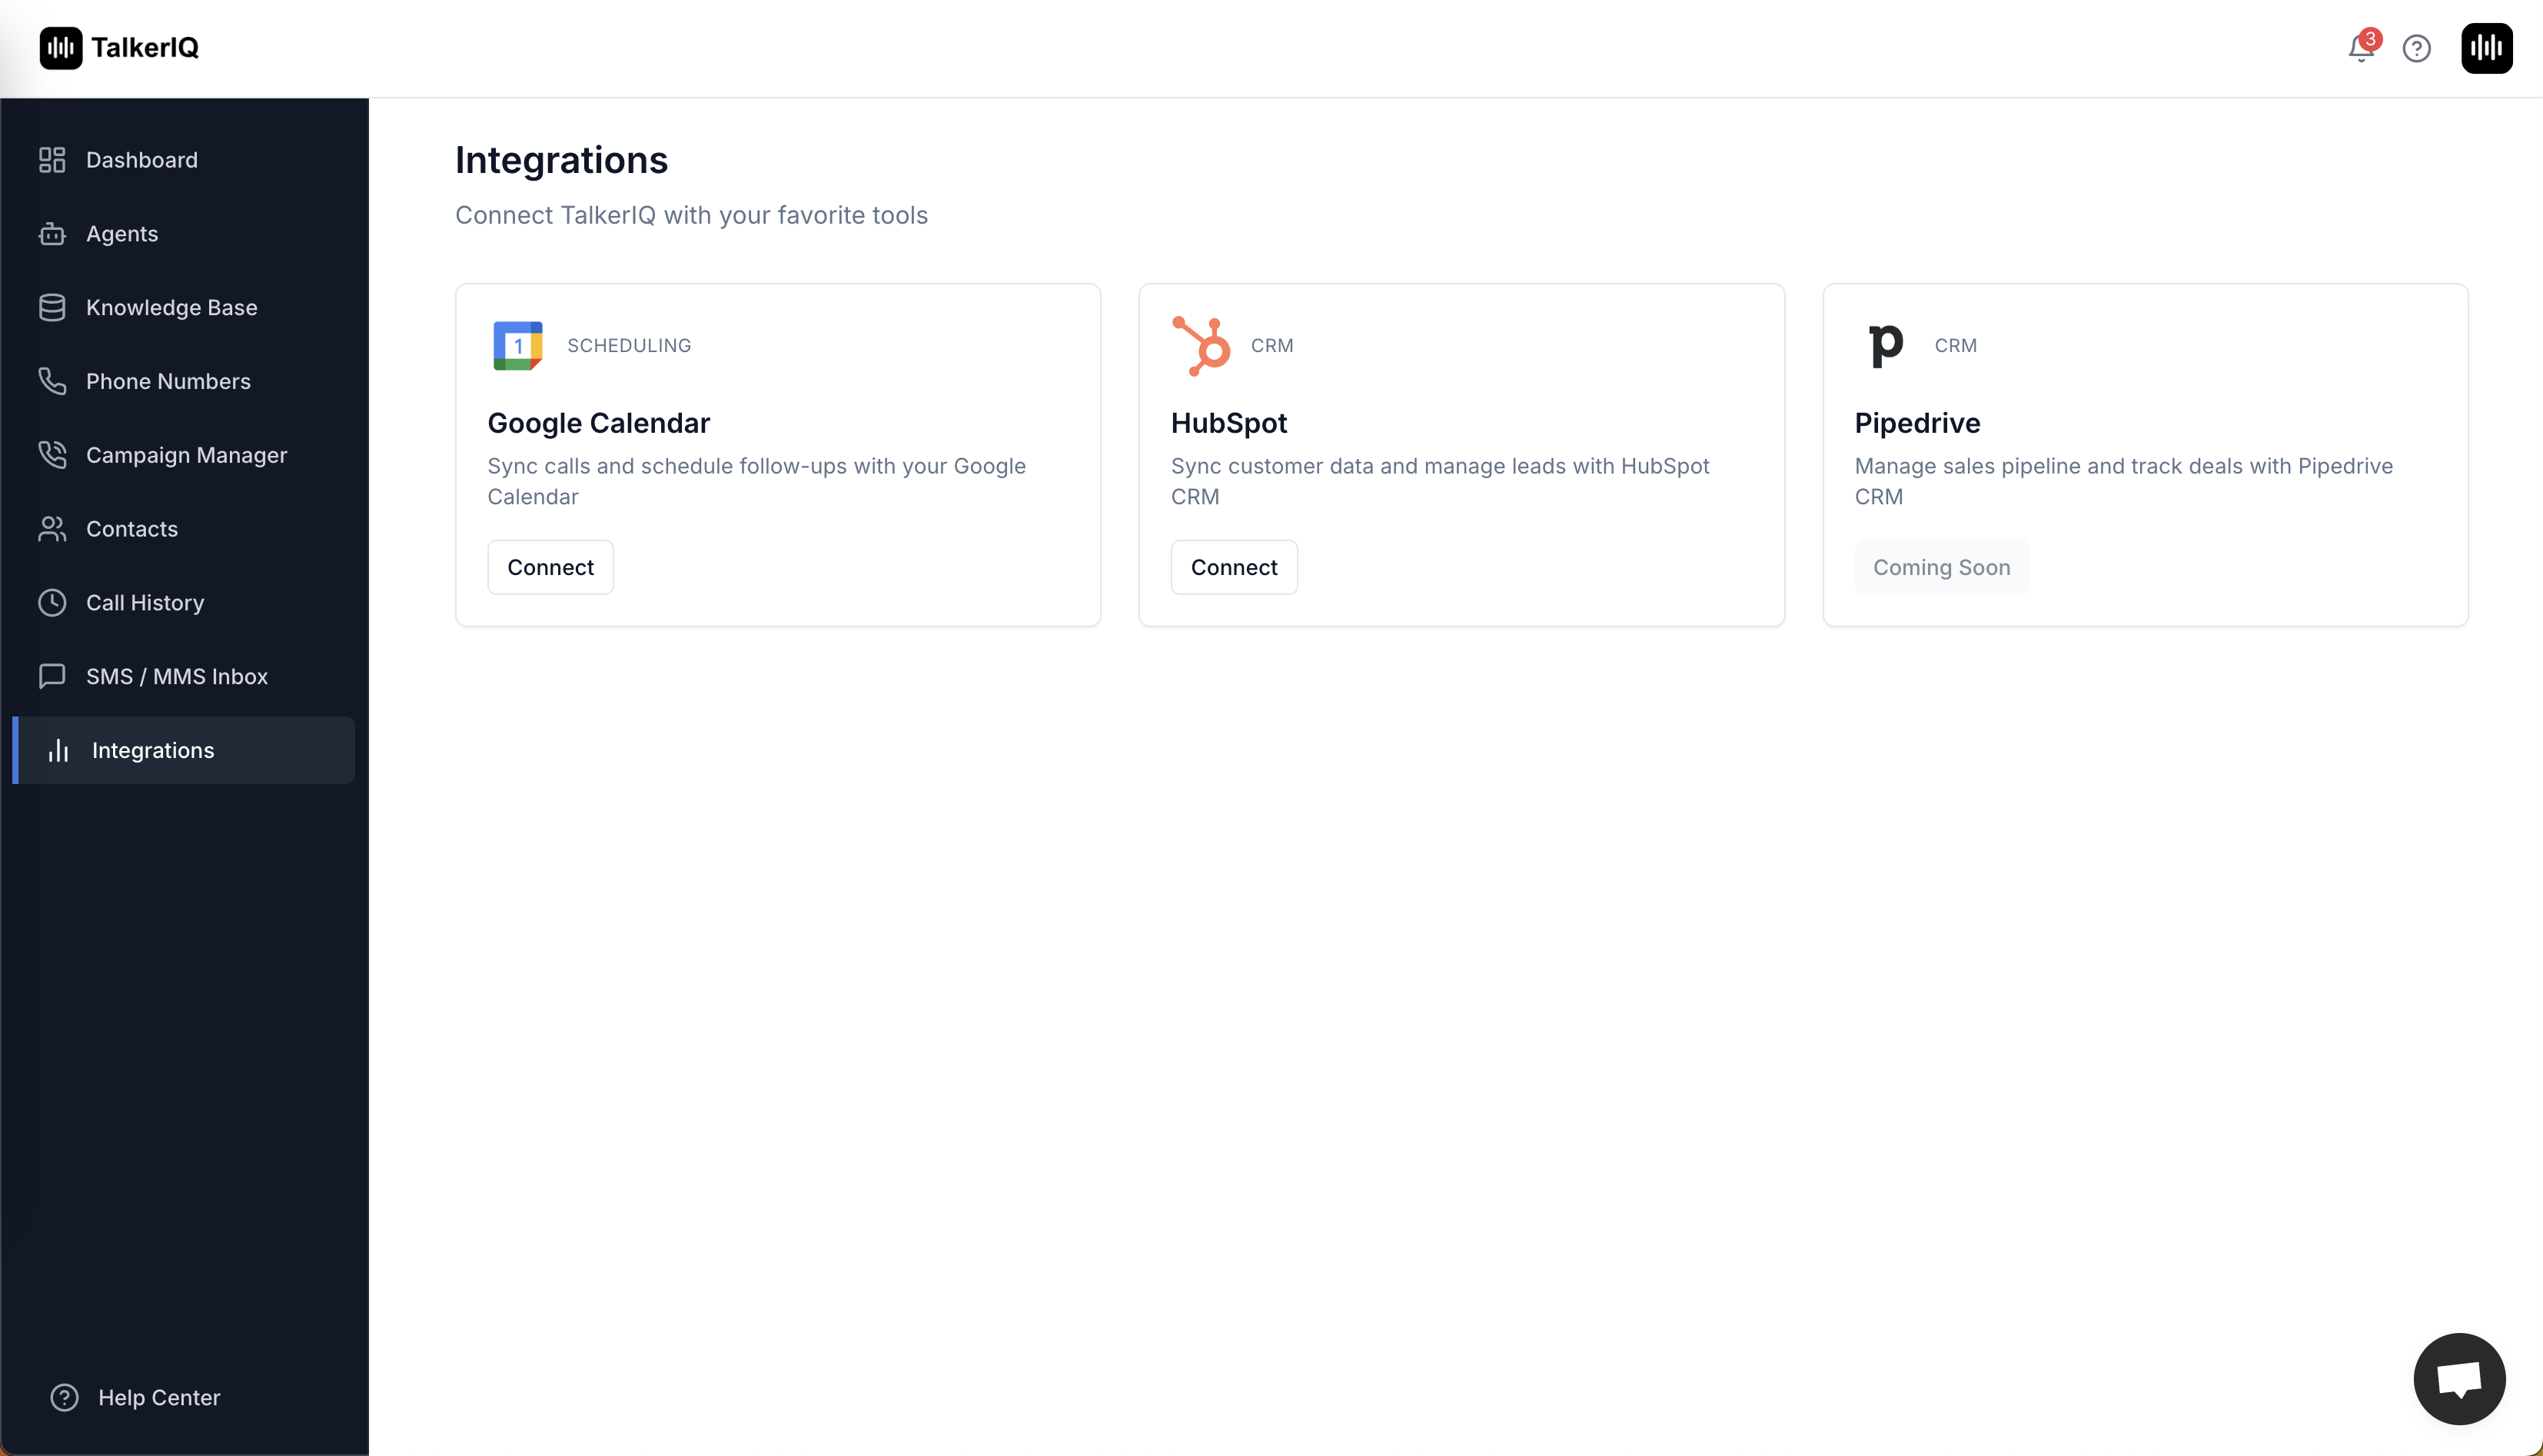
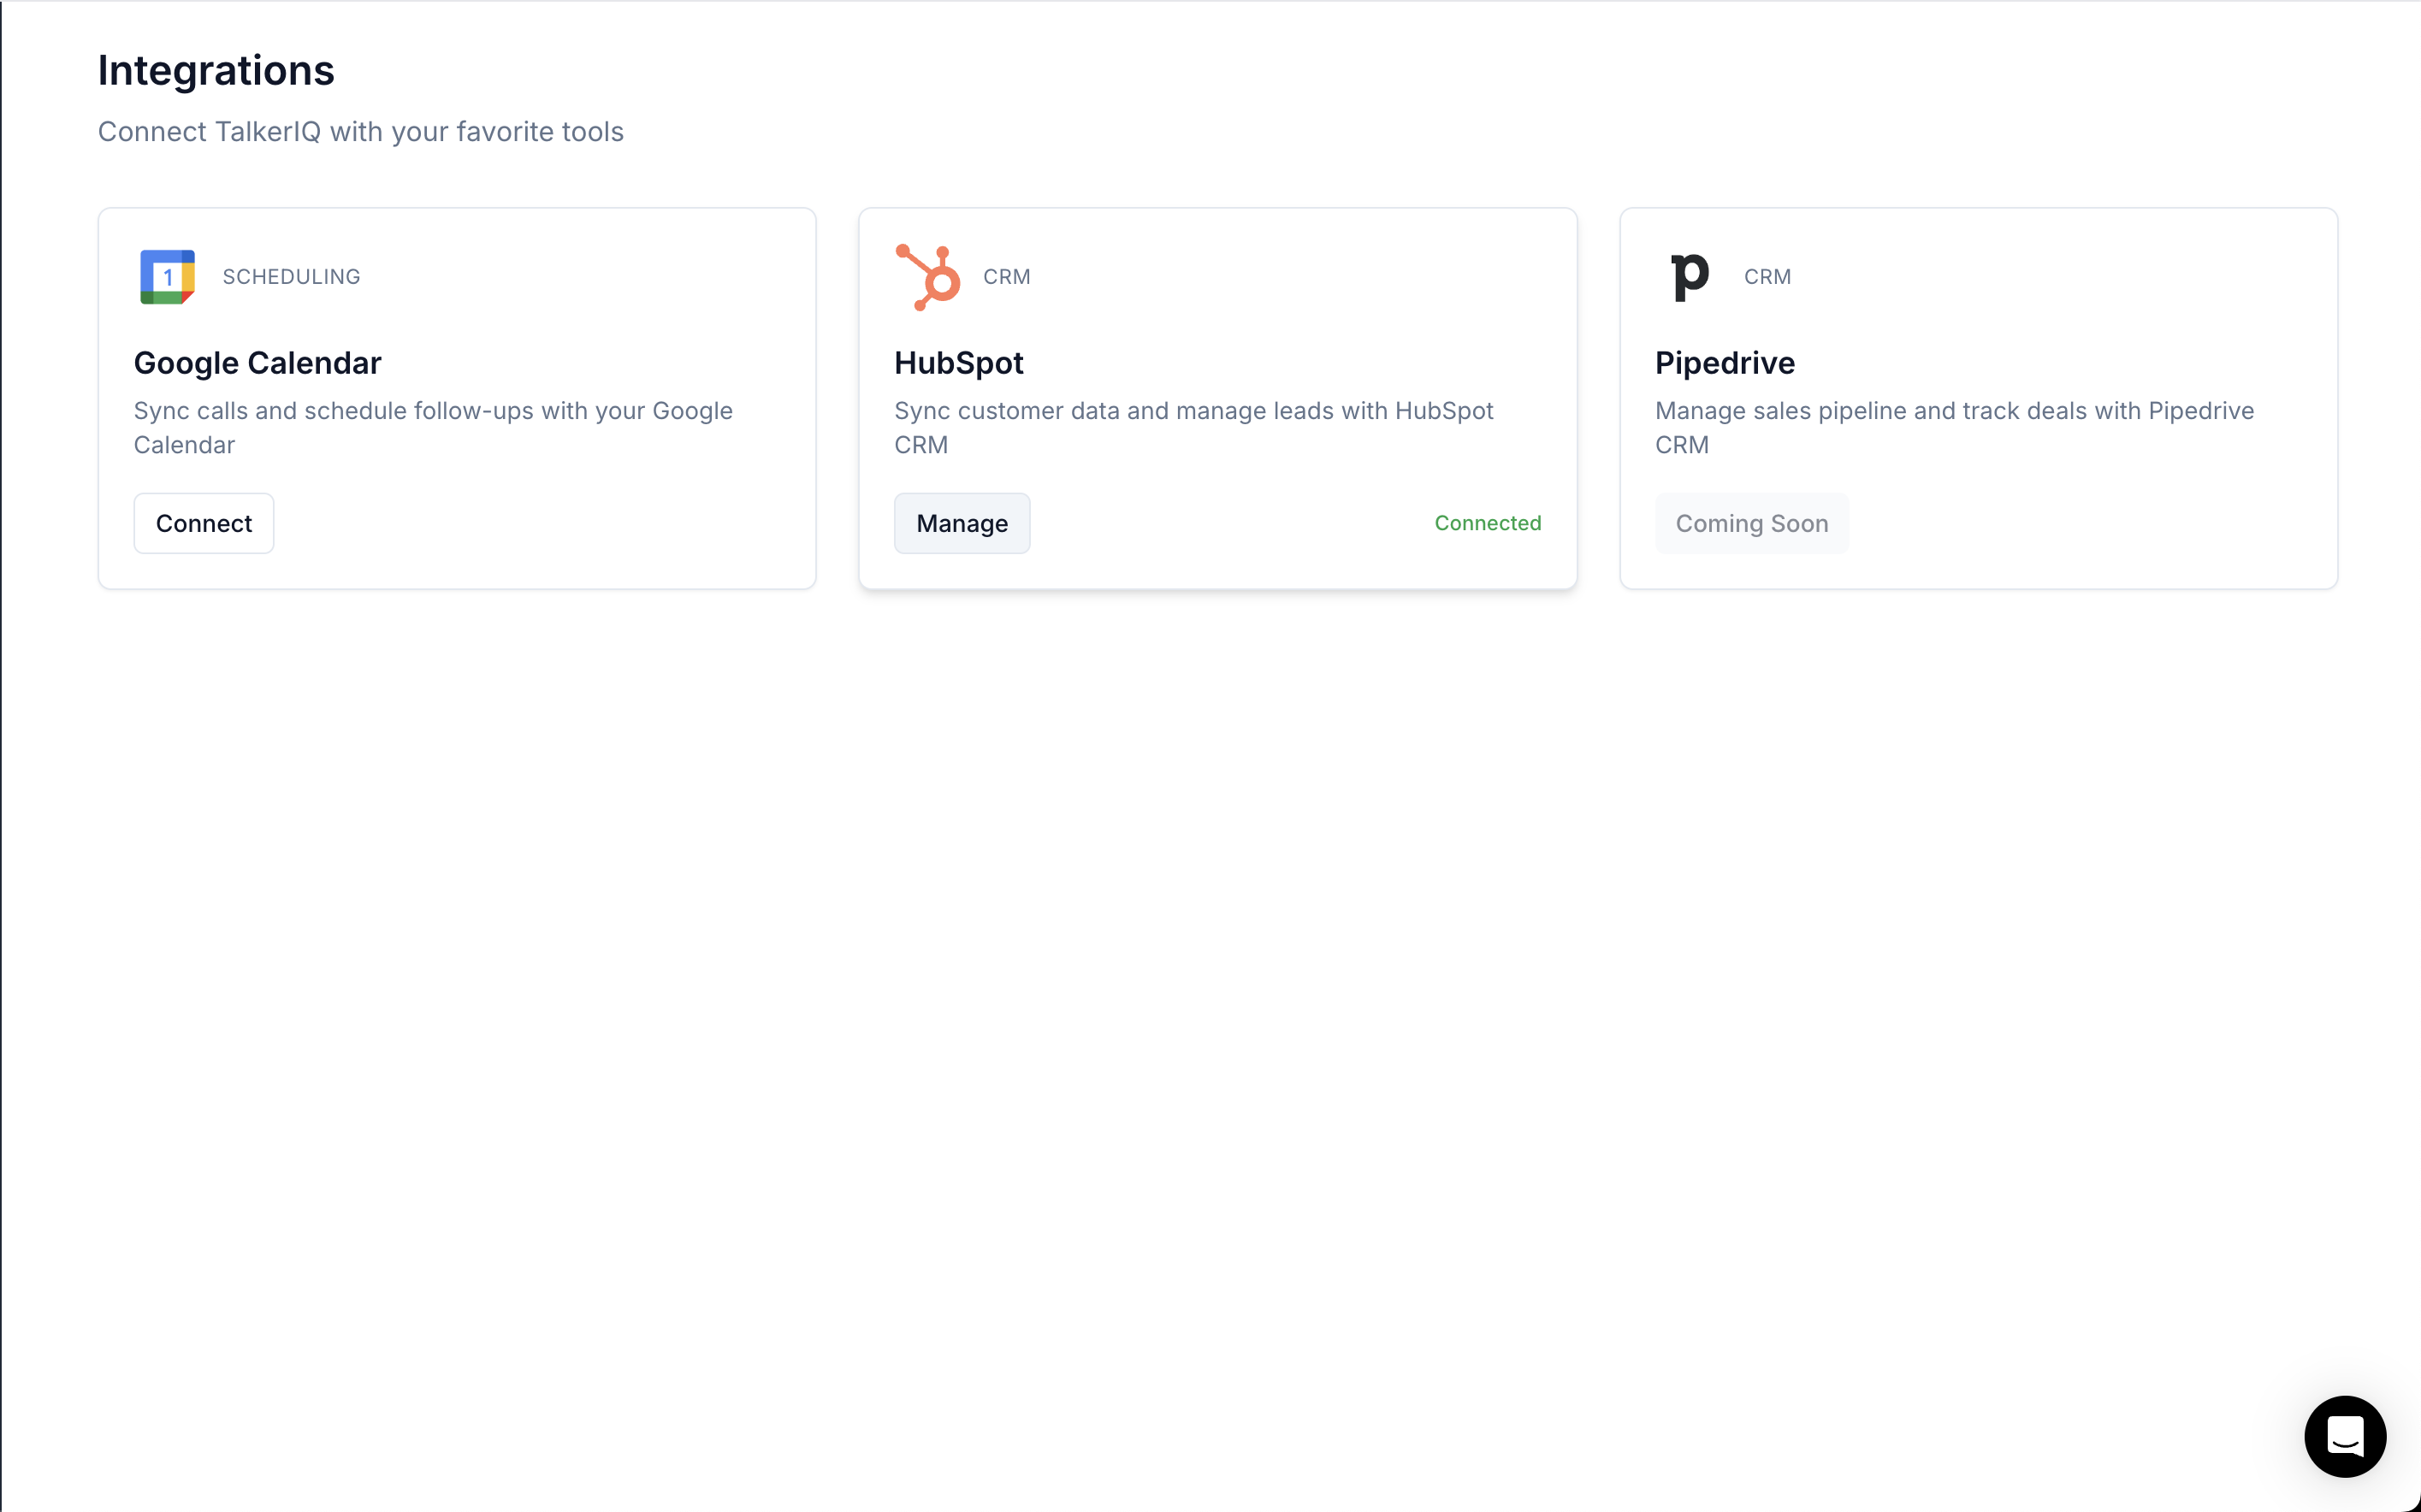
Log in to your TalkerIQ account, navigate to the Integrations section, and click "Connect" on the HubSpot card.
You'll find the Integrations section in your TalkerIQ dashboard. Look for the HubSpot integration card and click the "Connect" button to begin the setup process.
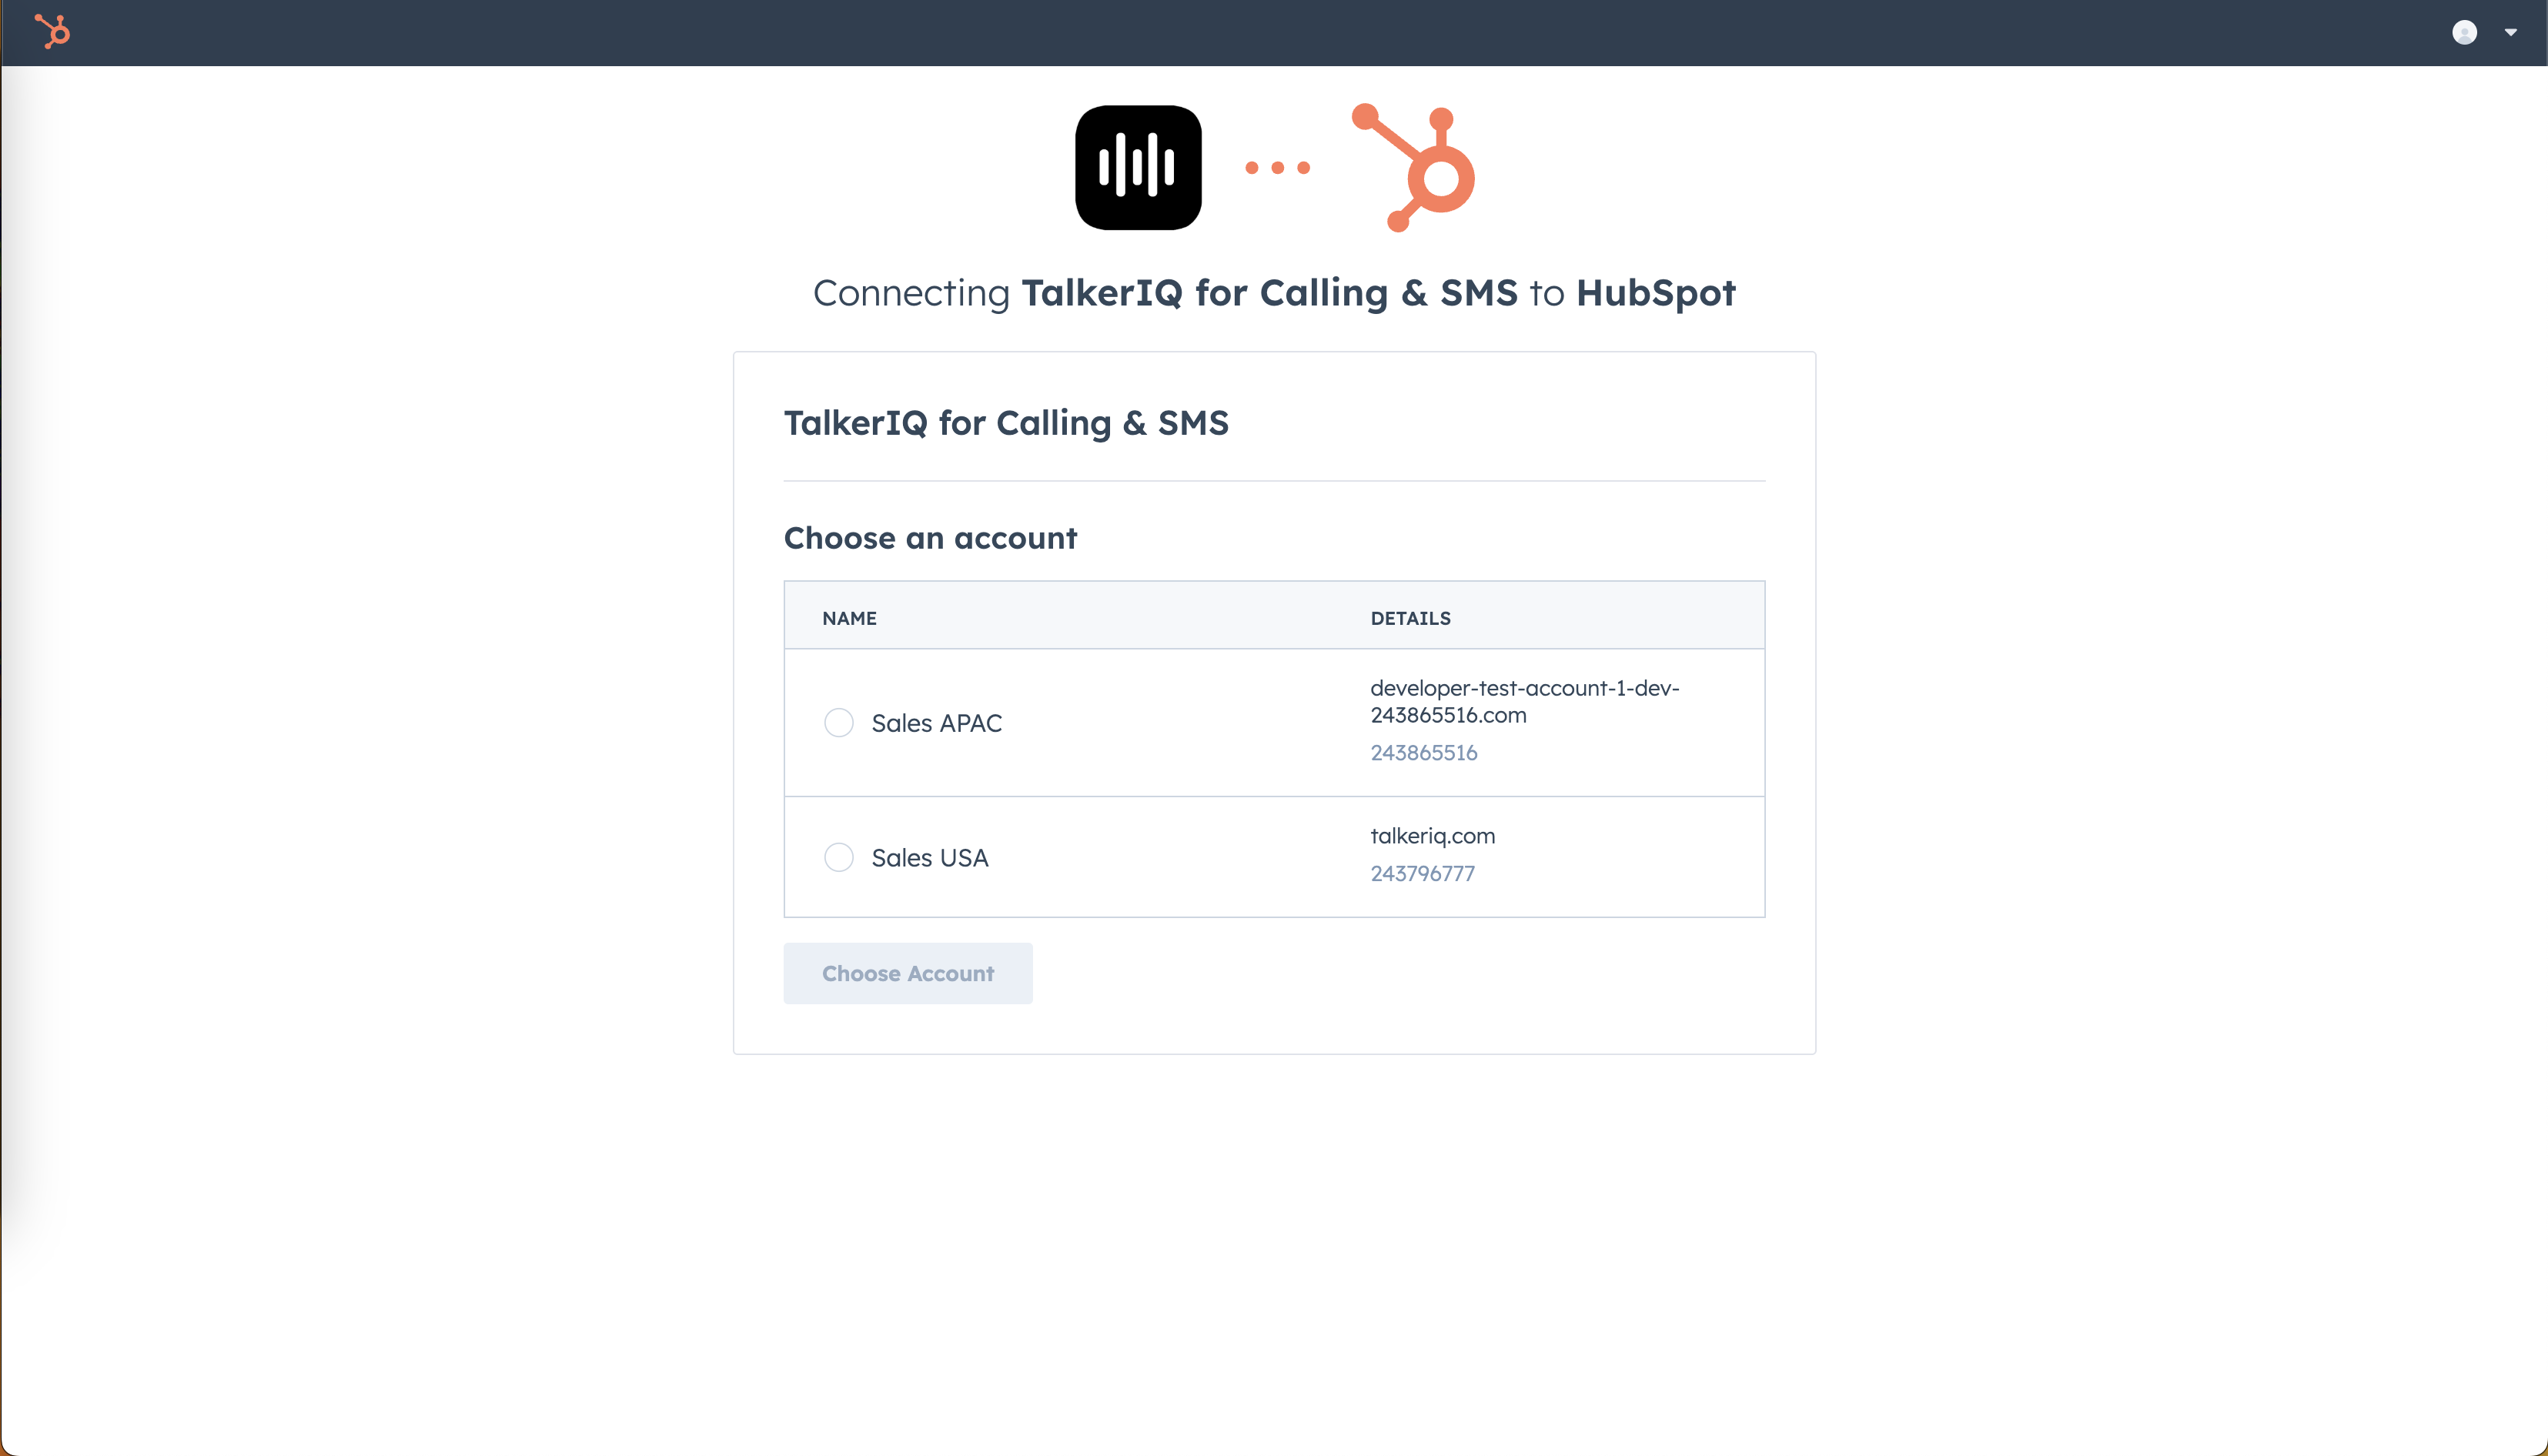
You will be redirected to HubSpot's website. Log in if prompted, select the HubSpot account you want to integrate, and click "Choose Account."
If you're not already logged in to HubSpot, you'll be prompted to enter your credentials. Once logged in, select the HubSpot account you want to connect with TalkerIQ.
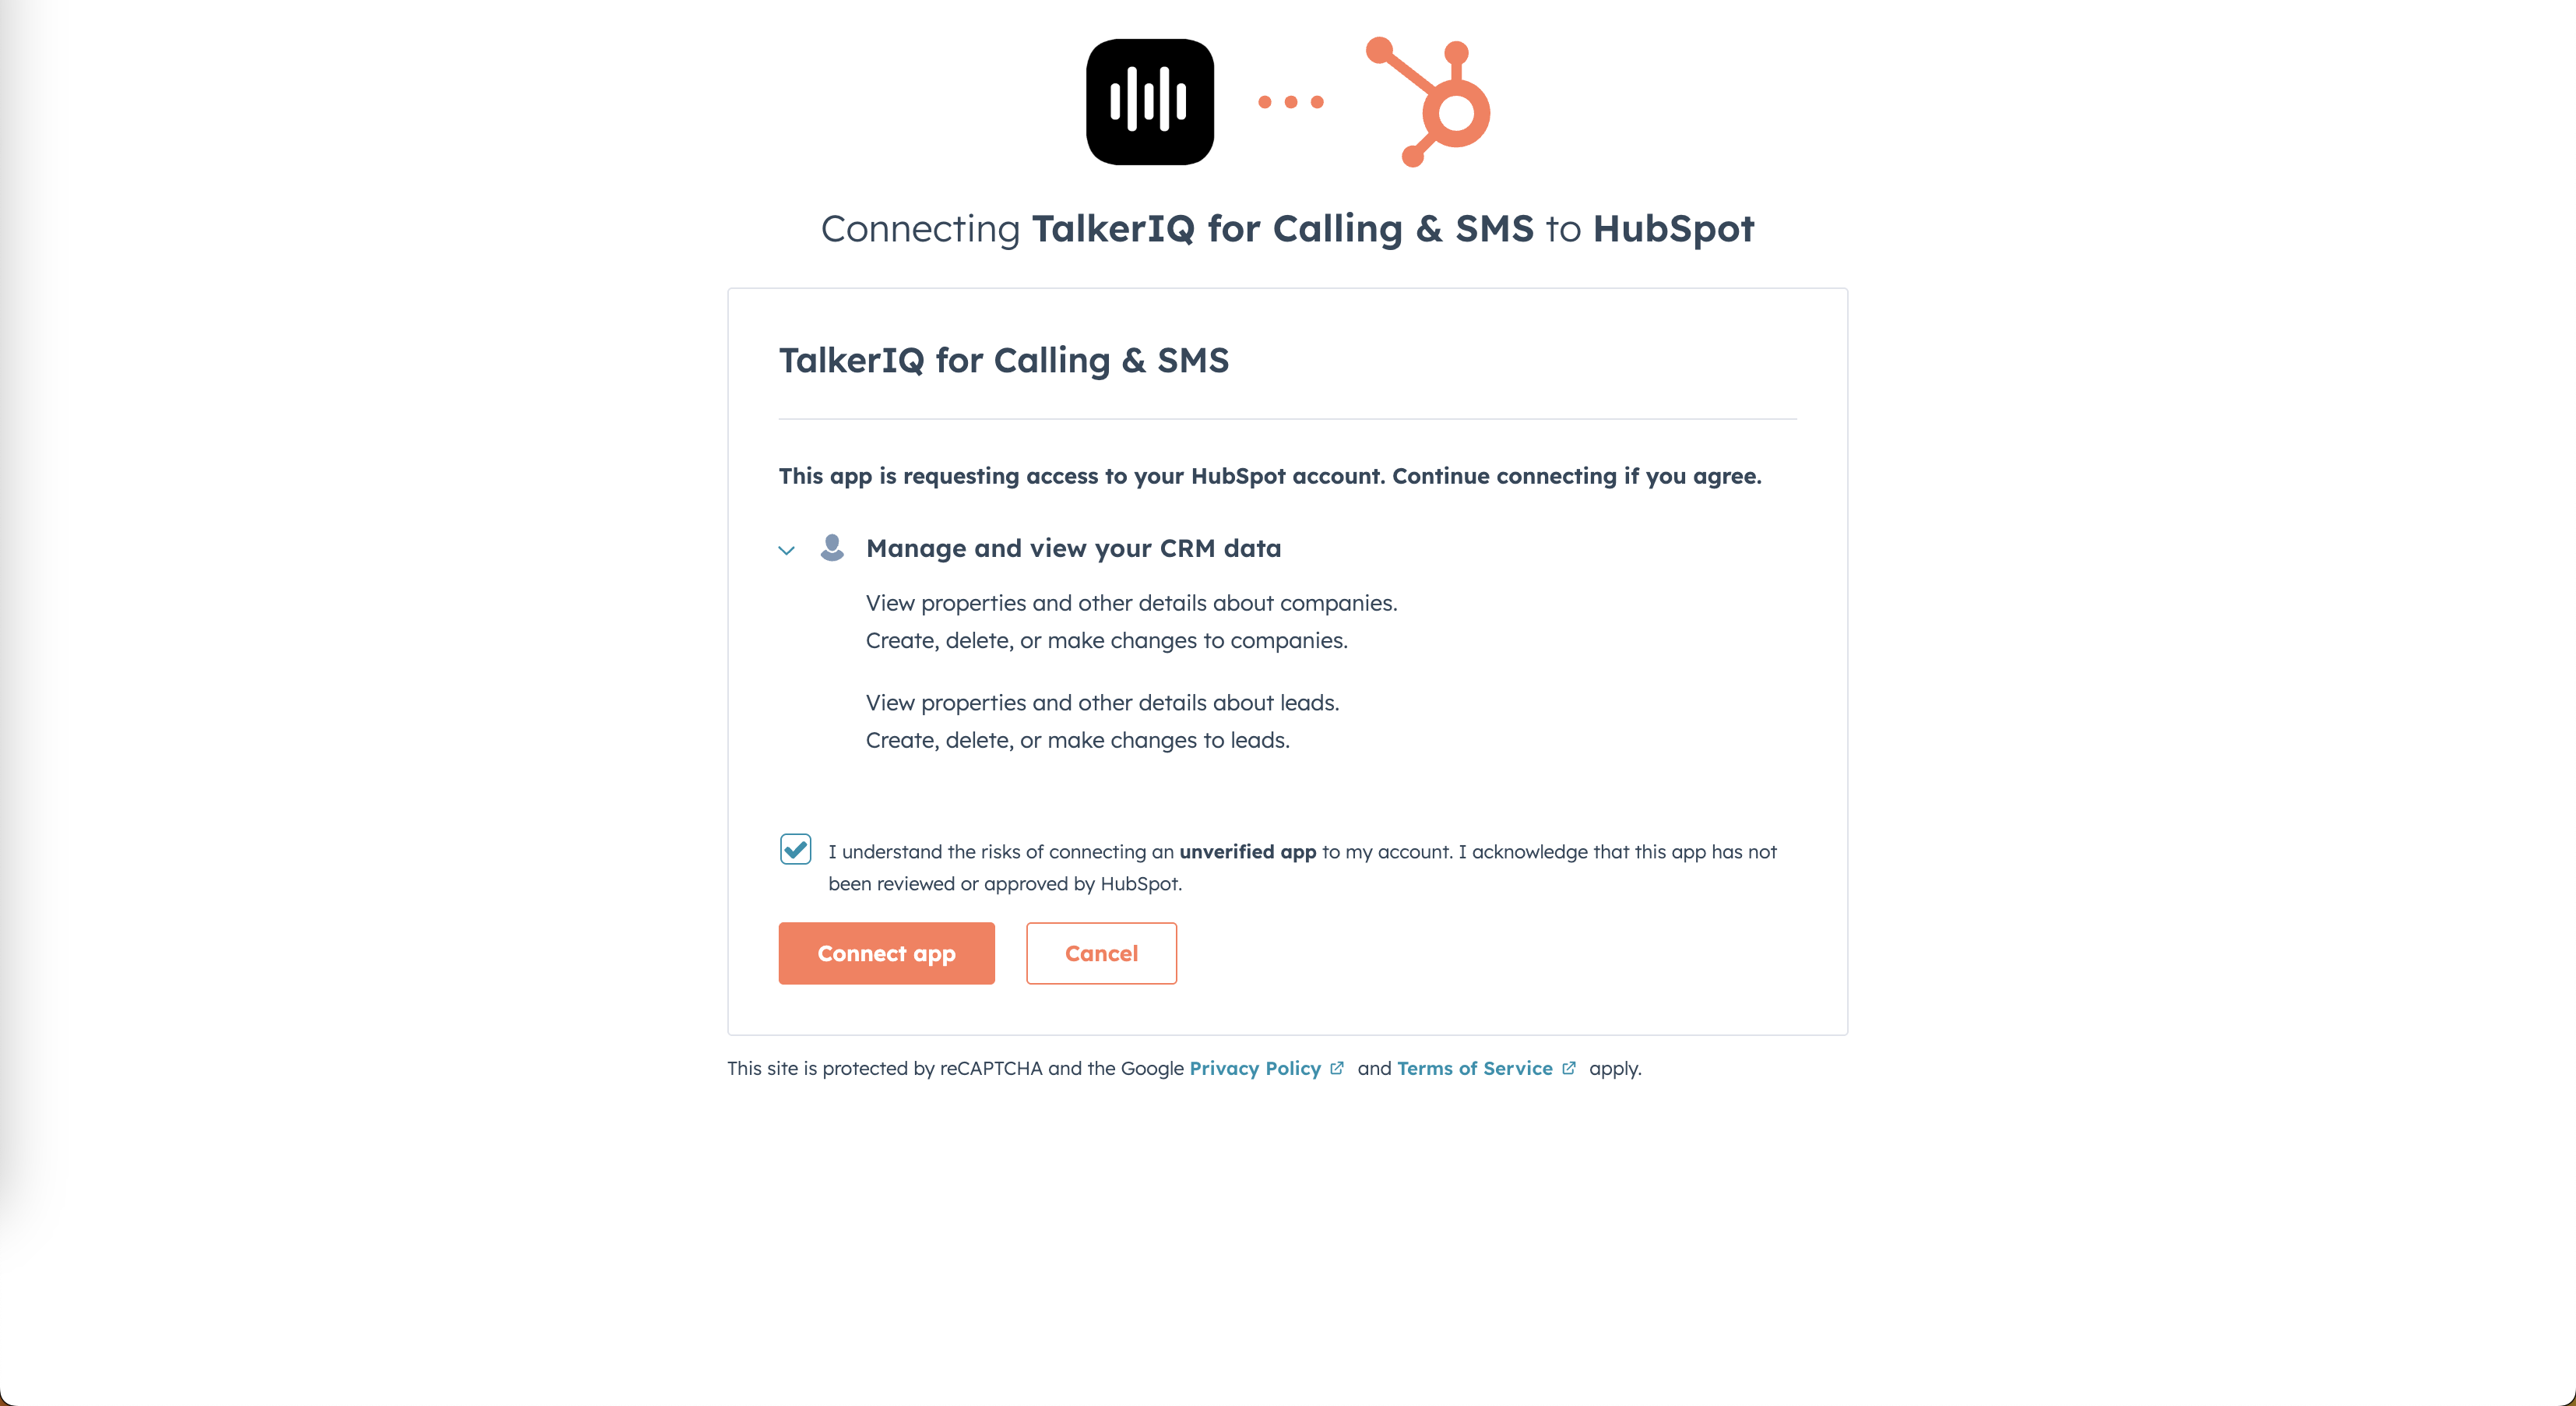
You will then be taken to a HubSpot permissions page showing the list of permissions requested. These are the minimum required for the integration to function properly. Review them and click "Connect app."
HubSpot will display the permissions that TalkerIQ needs to function. These permissions allow TalkerIQ to sync contacts, log calls, and update records. Review the permissions and click "Connect app" to proceed.
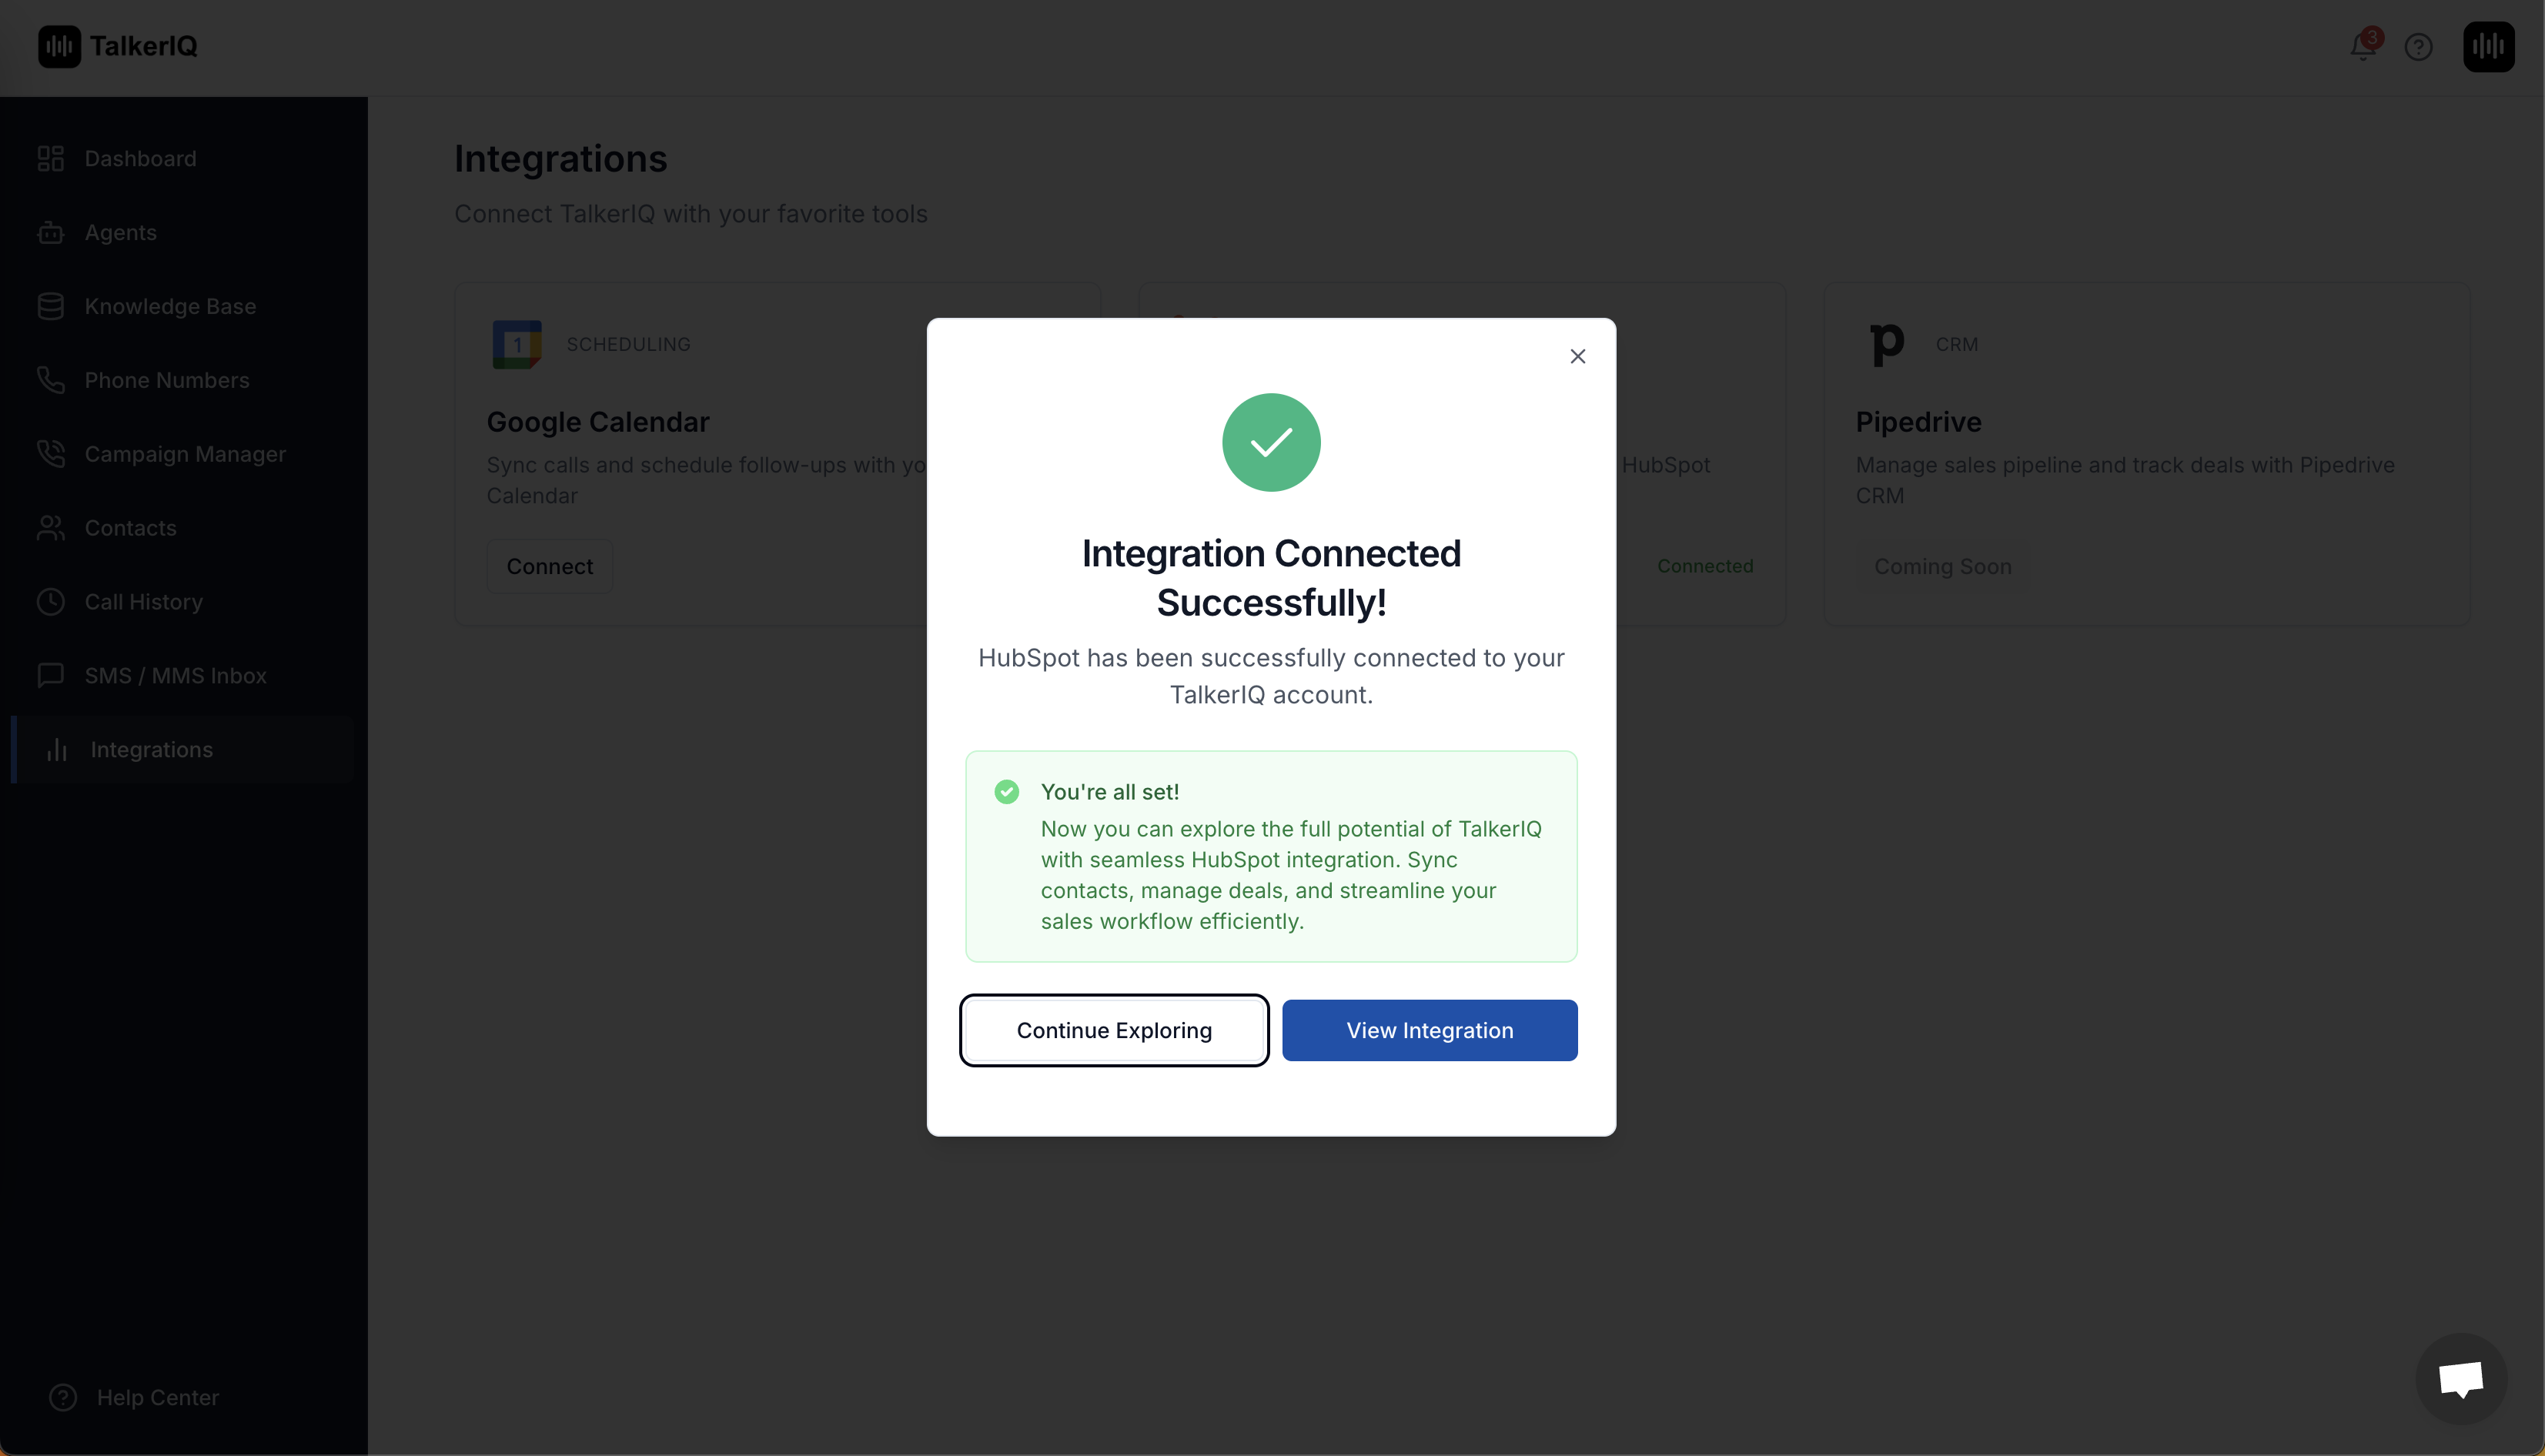
You will be redirected back to the TalkerIQ Integrations page with a success message, confirming that the integration is complete.
Once the integration is successfully connected, you'll be redirected back to TalkerIQ where you'll see a confirmation message. Your HubSpot integration is now active and ready to use!
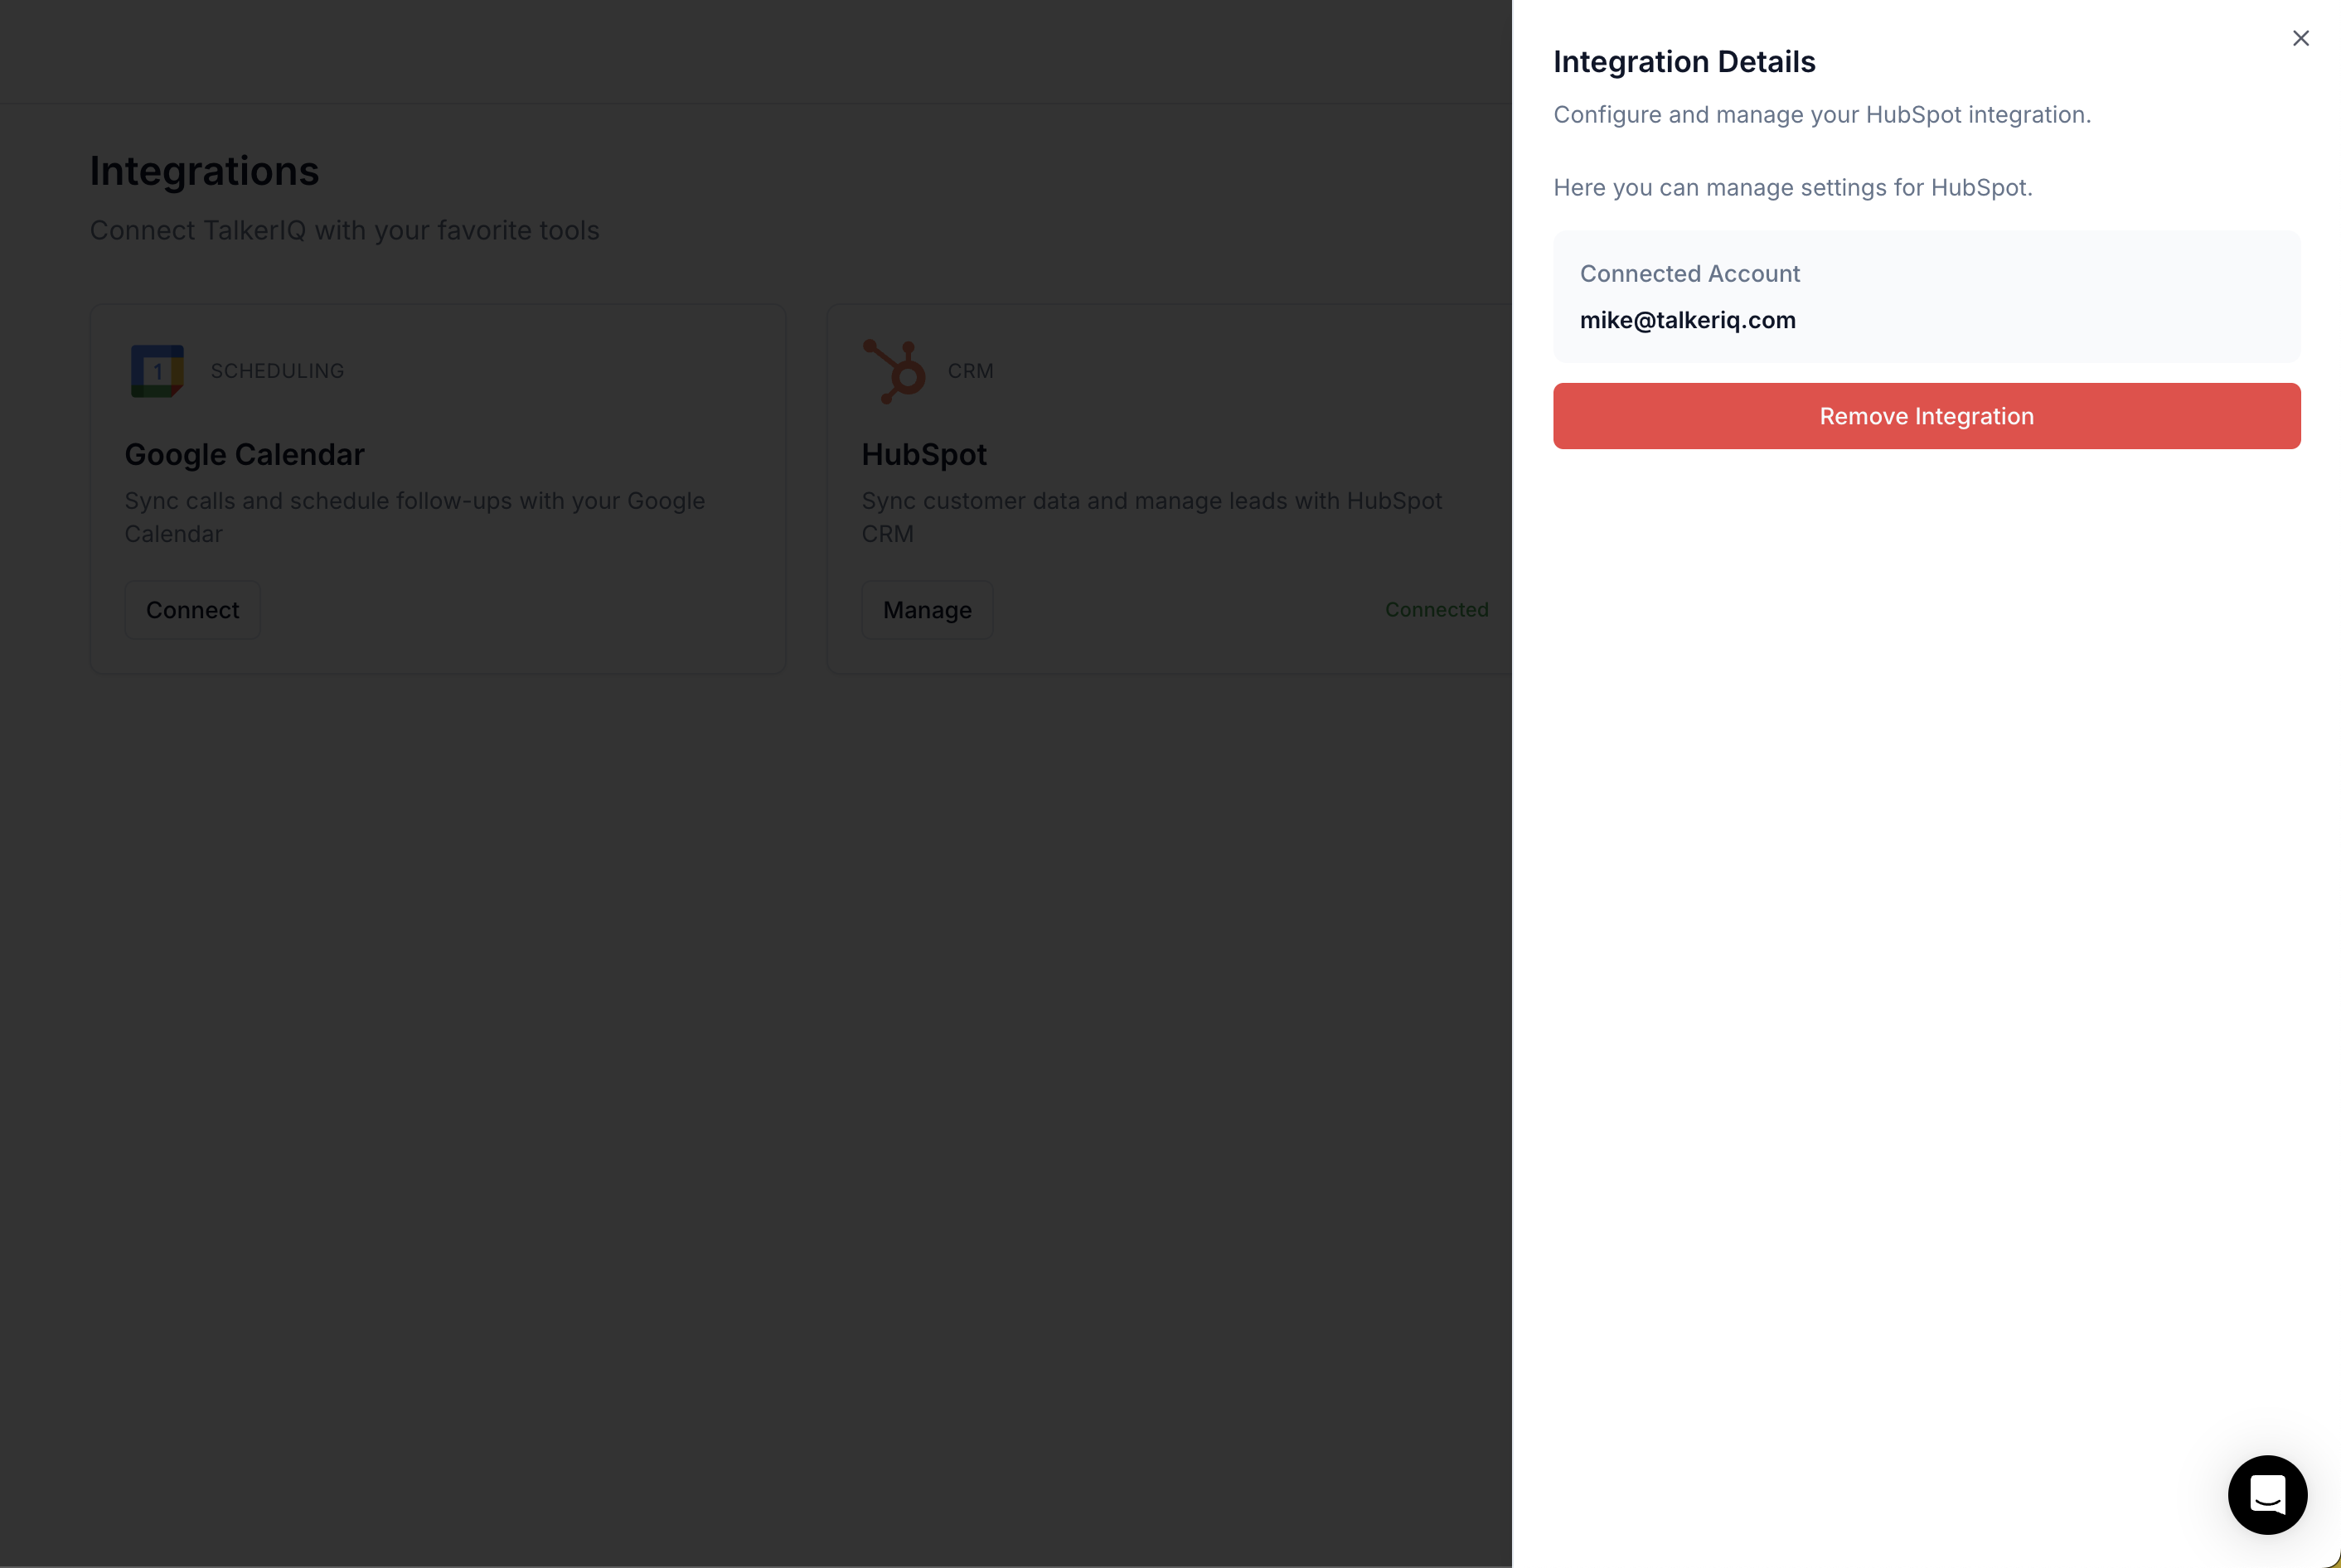
Navigate to the Integrations section in your TalkerIQ dashboard and click the "Manage" button for your HubSpot integration.
The Manage button opens the integration settings where you can view connection status and manage your HubSpot integration preferences. This is also where you'll find options to modify sync behavior or disconnect the integration if needed.
Click "Remove Integration" to disconnect your HubSpot integration from TalkerIQ.
Disconnecting will immediately stop all data syncing between TalkerIQ and HubSpot. All previously synced data will remain in your HubSpot account, but no new calls, SMS, or leads will be automatically logged. You can reconnect at any time by following the initial connection steps.
All leads from your AI voice agent calls are automatically synced to HubSpot, keeping your CRM up-to-date in real-time.
When your TalkerIQ AI agent interacts with potential customers over the phone, every lead is automatically captured and logged into HubSpot as a contact. The integration intelligently extracts key information from each conversation, including contact details, company information, lead source, and conversation notes.
TalkerIQ leverages HubSpot's lead management capabilities to:
This automated lead tracking eliminates manual data entry, reduces human error, and ensures no potential customer falls through the cracks. Your sales team can focus on closing deals rather than managing spreadsheets.

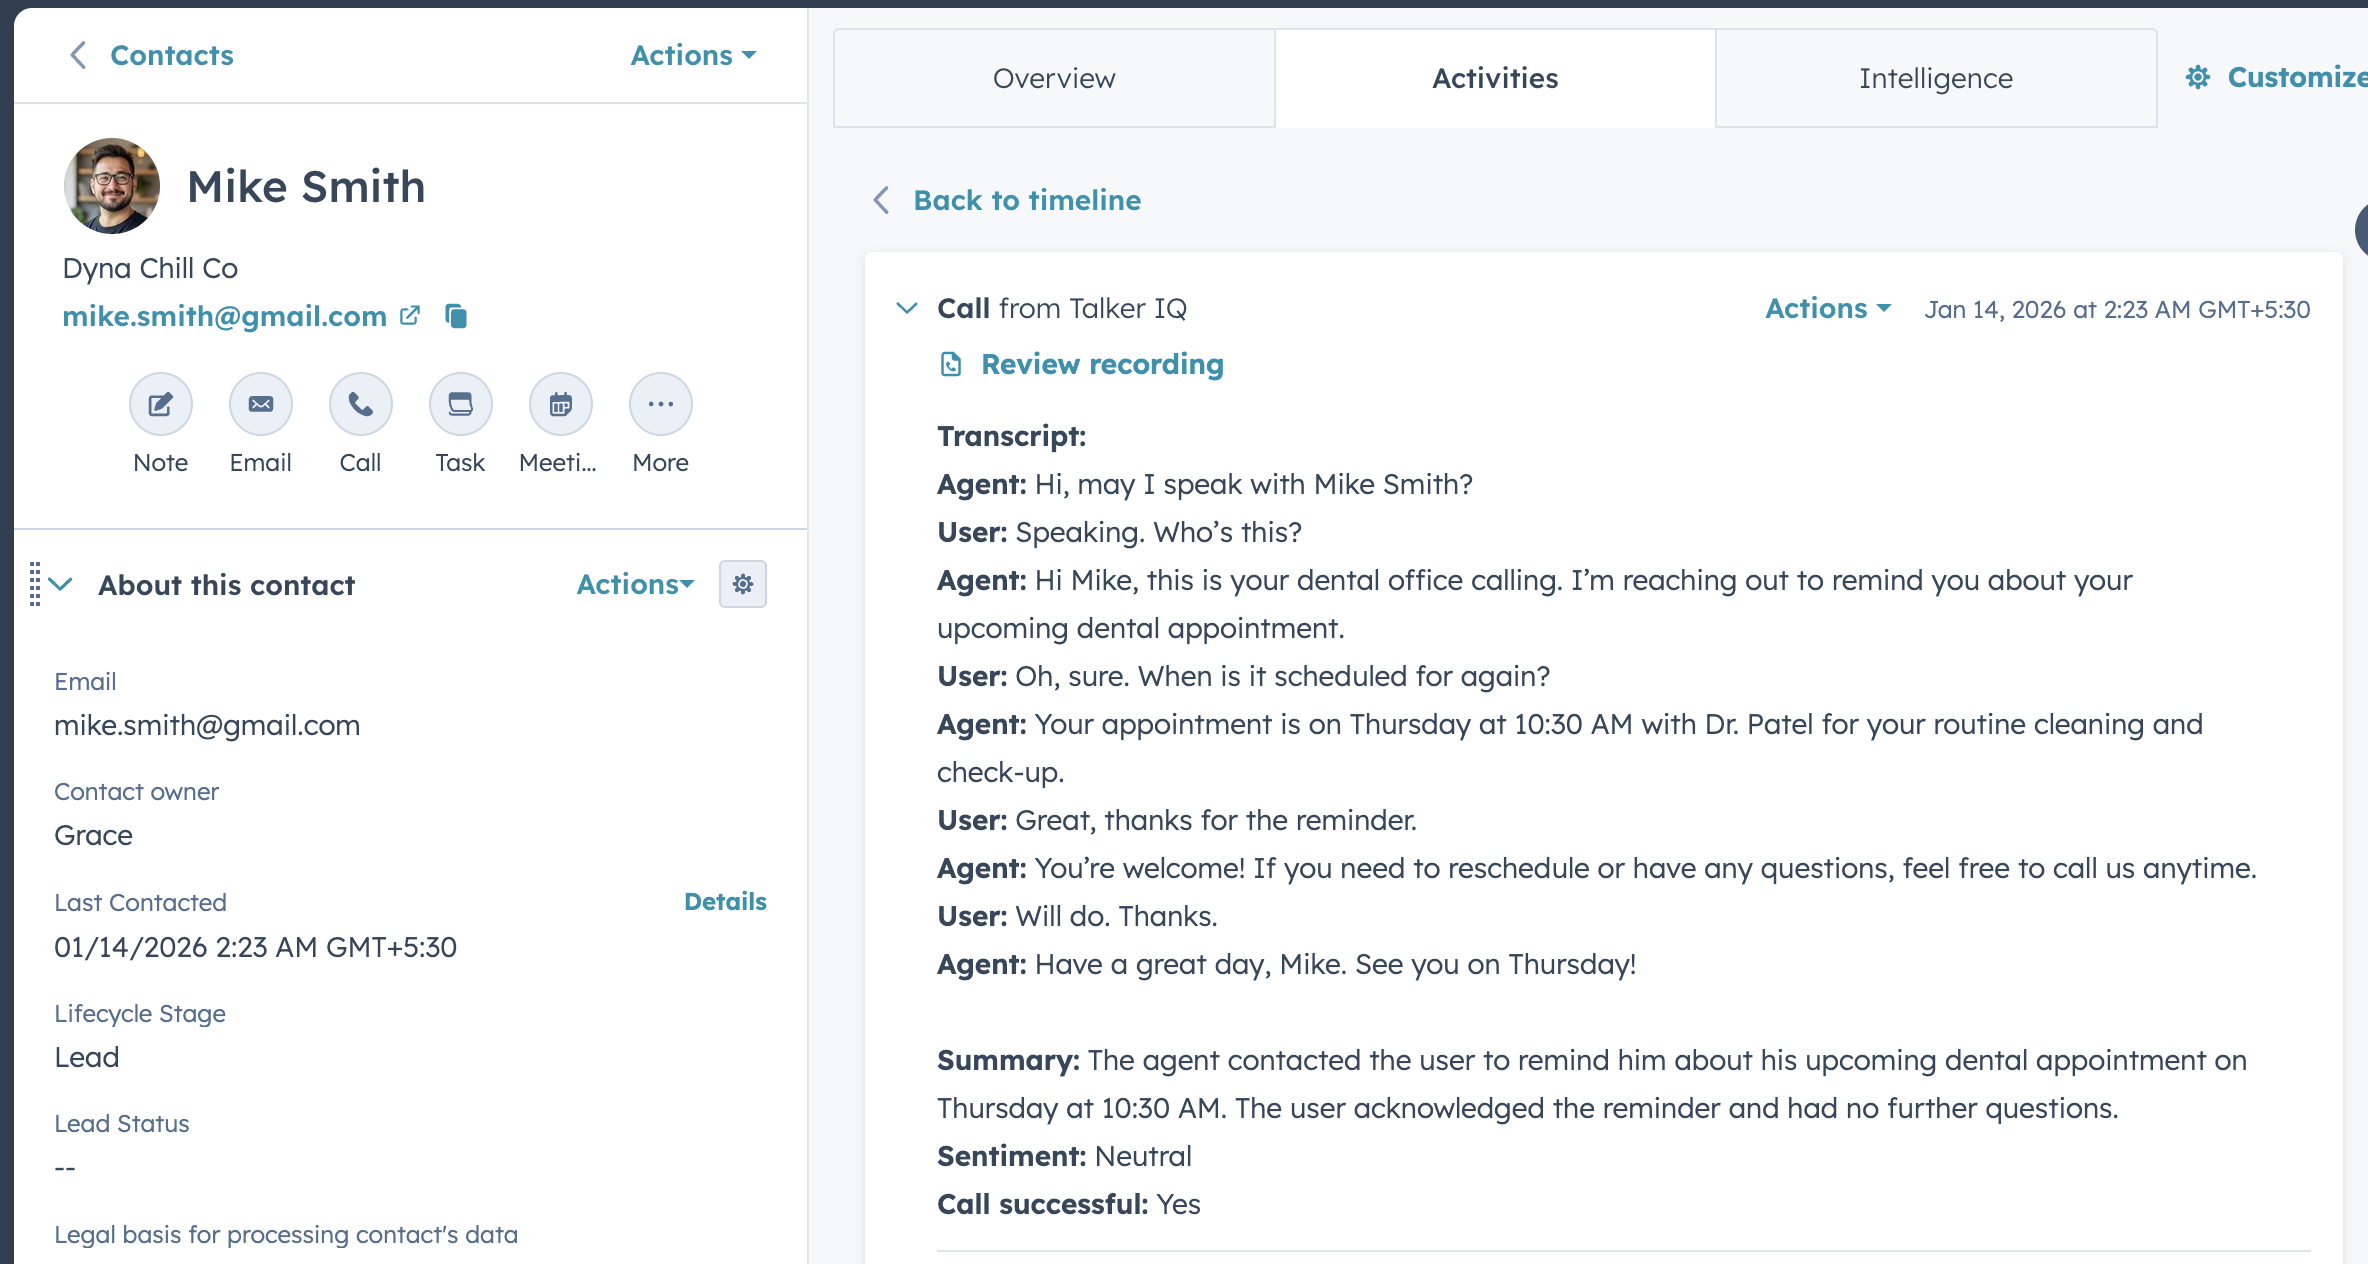
Every call made by your AI agent is automatically logged in HubSpot, providing complete visibility into customer interactions.
TalkerIQ automatically logs every call interaction into HubSpot's timeline feature, creating a comprehensive record of all customer communications. Each call is logged with detailed metadata including call duration, timestamp, call outcome, and a full transcript of the conversation.
TalkerIQ leverages HubSpot's call logging functionality to:
This comprehensive call logging ensures your team always has full visibility into customer interactions, making it easier to provide personalized service, identify sales opportunities, and maintain continuity across customer conversations.
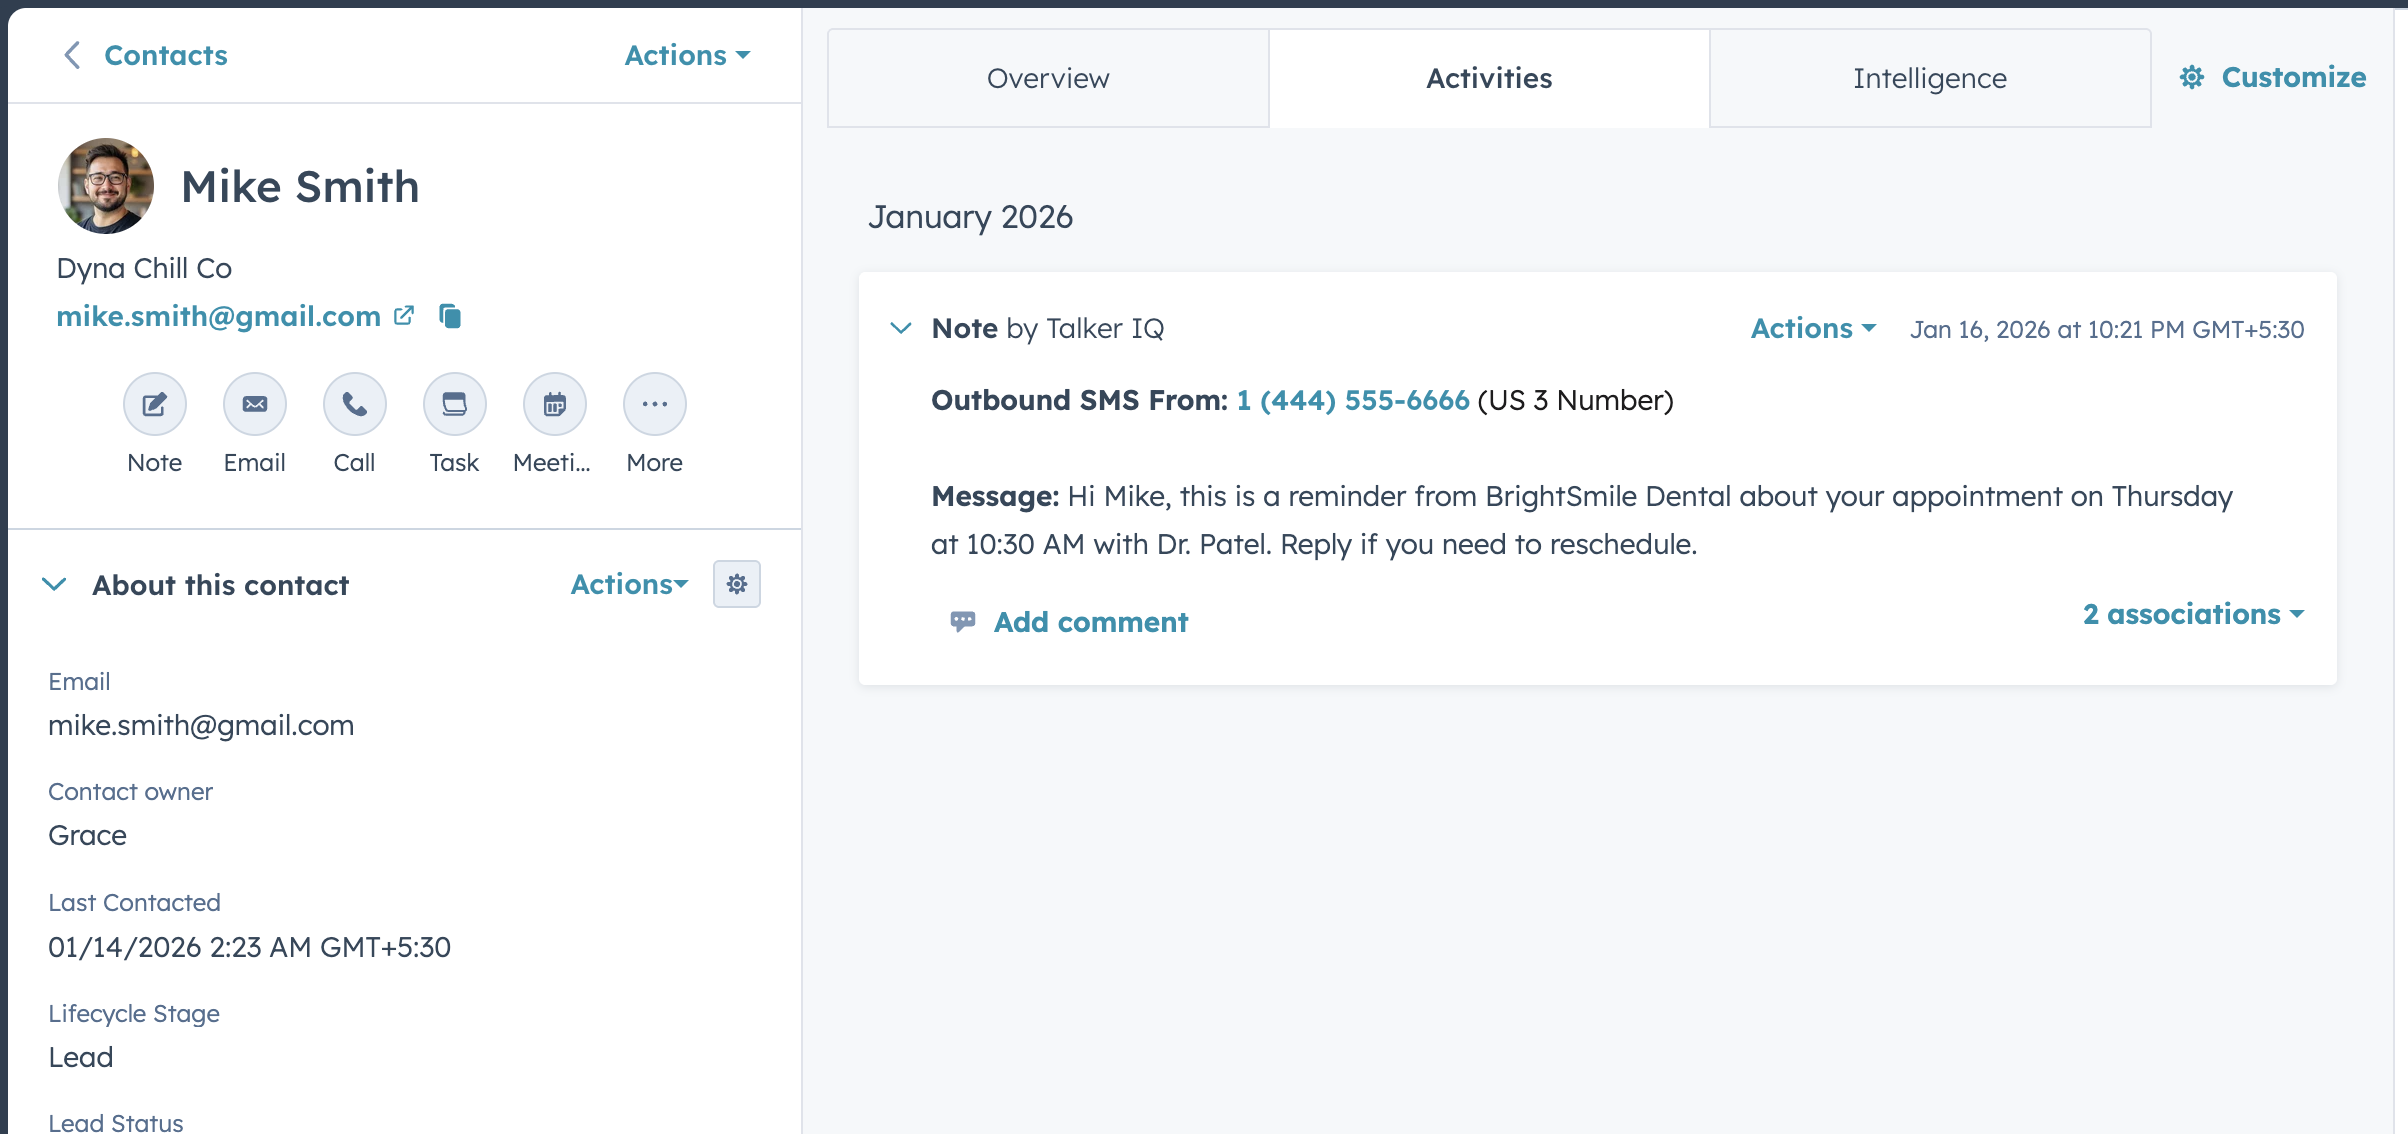
Seamlessly sync SMS between TalkerIQ and HubSpot, ensuring your customer conversation is always current.
All SMS conversations handled by your TalkerIQ AI agent are automatically synced to HubSpot's conversations inbox, creating a unified view of all customer communications across channels. Whether your AI agent sends appointment confirmations, answers questions, or follows up with leads via SMS, every message is logged in HubSpot.
TalkerIQ leverages HubSpot's SMS and conversation logging functionality to:
This bidirectional SMS sync ensures that all customer conversations—whether via phone or text—are captured in HubSpot, giving your team complete visibility and enabling more personalized, context-aware customer service across all communication channels.